


Sorry for the dramatic title but I thought it was a nice catchy way to get you to read this. I love to bar-b-que, love to talk about BBQ and most of all love to eat BBQ. Because we live in the north east the best chance we have of eating some really good BBQ is to make it.
To clarify true BBQ is food that is cooked in the presence of smoke. If you are used to grilling (open flame cooking without smoke) then this will be a small step towards deliciousness. BBQ is also done at a lower temperature than grilling and will usually turn out fantastic results if you take your time and cook for a longer time.
First time smokers (BBQ not the other stuff) should really try poultry. Chicken is easy to cook and will be a good way to see the demarcated difference between every day oven roasting and BBQ. For the purpose of this BLOG I’m going to skip right to level two and talk about pork but mostly because that is what I have good photos of. Here is my step by step:
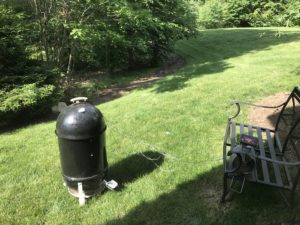
 1. Set up the smoker. I use the minion method for smoker preparation which means I light only a small portion of charcoal and fill the rest of it with unlit. To make this easy I put a tin can with both ends removed on the side of the smoker that is away from the intake fan. I then fill the rest with unlit charcoal briquettes and 4-5 pieces of lump hard wood, for pork I like apple wood.
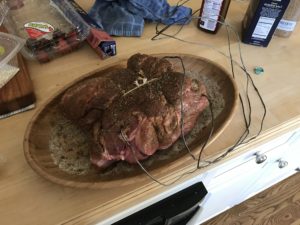 2. Set up the pork. I start with a 10-12 pound Boston Butt. I put it in a brine for 12 hours. I usually use a cup of kosher salt and half cup of dark brown sugar in a gallon of water. When it comes out of the brine I pat it dry and then I give it a homemade low salt rub. If you find me in the clinic I’ll share my secret recipe. If no one asks me for a recipe I will know that no one has read this! I truss it with butcher twine and stab it with the probes.
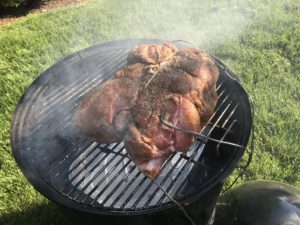 3. Start cooking. I put internal probe thermometers in the pork to monitor the temp of the meat. I also have an ambient thermometer in the cooker to be able to see how the coals are doing. I fire up a handful of coals using a chimney starter and drop them into the can and then remove the can. I like the smoke to cook at around 200-225F.
 4. Patiently cook. This is the part that takes some patience. With this method of coal prep I can usually get an 18 hour cook. For a 10 pound pork butt this is about the total cook time and the smoker will usually get me there. The meat will stop taking smoke around 140 degrees and will be done when it reaches 195 degrees. That means that you can wrap it in foil at the 140 point and stop worrying where the heat comes from. You can read that last sentence as it is fine to move this thing to an oven inside your house and still tell people this is BBQ. I usually don’t wrap at 140 because I really like the crispy outside bark I get when I don’t but if you want juicier pork wrap the pork in foil after 140 degrees and keep it wrapped until you get to 195 degrees. When it reaches 195 degrees I remove it and let it rest for at least 45 minutes.
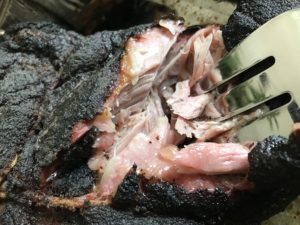 5. Fun part. After the meat is well rested I start pulling it apart using two forks, my protected hands or wolverine claws. Pulled pork gets put in a separate container and put the accumulated juices back on the pork.
6. Eat. I recommend potato roll slider with some fresh cold pack dill pickles and Sweet Baby Rays sauce! Aaaaaand a carbonated beverage.
This is what a happy orthodontist looks like!
Have a great time cooking and please let me know if you try it!
By Dr. Jamie Kane